When viewing a map, there's a toolbar in the top left corner. The tools available will depend on if you are a spectator, player, or owner of the map.
Simple Select

This tool allows selecting combatants. What you select is not sent to other participants. If you are an player or owner, you can then move the combatant by dragging them around the map. Movement is updated for all other participants as you go.
Ghosting
The simple select tool has a drop-down option. The option enables "ghosting".

Ghosting is used when you want to point out something on the map. It creates a copy of your cursor relative to the grid itself, and sends the position to other participants as your mouse or pointer moves.
Because your ghost is relative to the grid itself, if you hover over a combatant, it will appear over that same combatant for all other participants no matter their zoom or pan.
Each participant's ghost has a unique color, and that color is consistent for each participant. In other words, if your ghost is green, your ghost is green for everyone else too. The colors may be re-assigned if a participant is added or removed.
Spectators cannot ghost.
Measuring
The measure tool tells you distance information between two cells.

After selecting the measure tool, click on the starting cell. It will show the measurements as you move your pointer or mouse around. Click again to place a static line.
While measuring, you cannot pan nor select combatants. You can still zoom.
Your measuring is not shown to other participants.
The measurements shown depend on the cell shape.
There are 2 measurements shown for square grids.
"Biggest" is the larger of horizontal or vertical distance. For example, if you went left 5 cells then down 2, largest is 5. If you went up 20 cells, and right 19, largest is 20.
"Actual" is the precise distance between the two cells. It uses the actual distance calculation, square root and all. For readability, it is truncated to 2 significant decimal places.
There is only 1 measurement shown for hex grids.
"Hexes" is the number of hexes entered to get from the starting hex to the ending hex.
The Toolbox
The toolbox contains less commonly used tools, such as adding combatants or editing the grid colors.

The toolbox is shown only to participants and the owner. Even then, not all tools are shown to participants.
Select Combatant
This displays the name of the currently selected combatant (if any), as well as a list of all combatants you can see. It's an alternate way to select a combatant than needing to find them on the map and click on them.

The combatant you select is not shown to other participants.
Default Region
This tool is only visible to owners with the toolbox open. This sets the region new combatants or zones will be assigned to. When editing a combatant or zone, it sets the region it will be assigned to.
Add A Combatant
Only visible to players and owners, the add combatant tool is the first tool inside the toolbox.

The dropdown list shows the characters you have. When you click on, it fills in the settings. You can then alter the settings as you choose.
After you have the settings to your liking, click anywhere on the map to add a combatant there. You can click and drag to change the position. The new combatant is only added once you life you mouse or finger up.
The settings of the add combatant tool are saved between additions, so you can reselect the tool and add more.
Edit a combatant
While the toolbox is open, using the select combatant tool will double as the edit combatant tool. This shows the settings for the combatant, as well as the delete button.

Delete a combatant is permanent and cannot be undone.
The owner can edit any combatant. Players can only edit combatants they can see.
Edit Regions
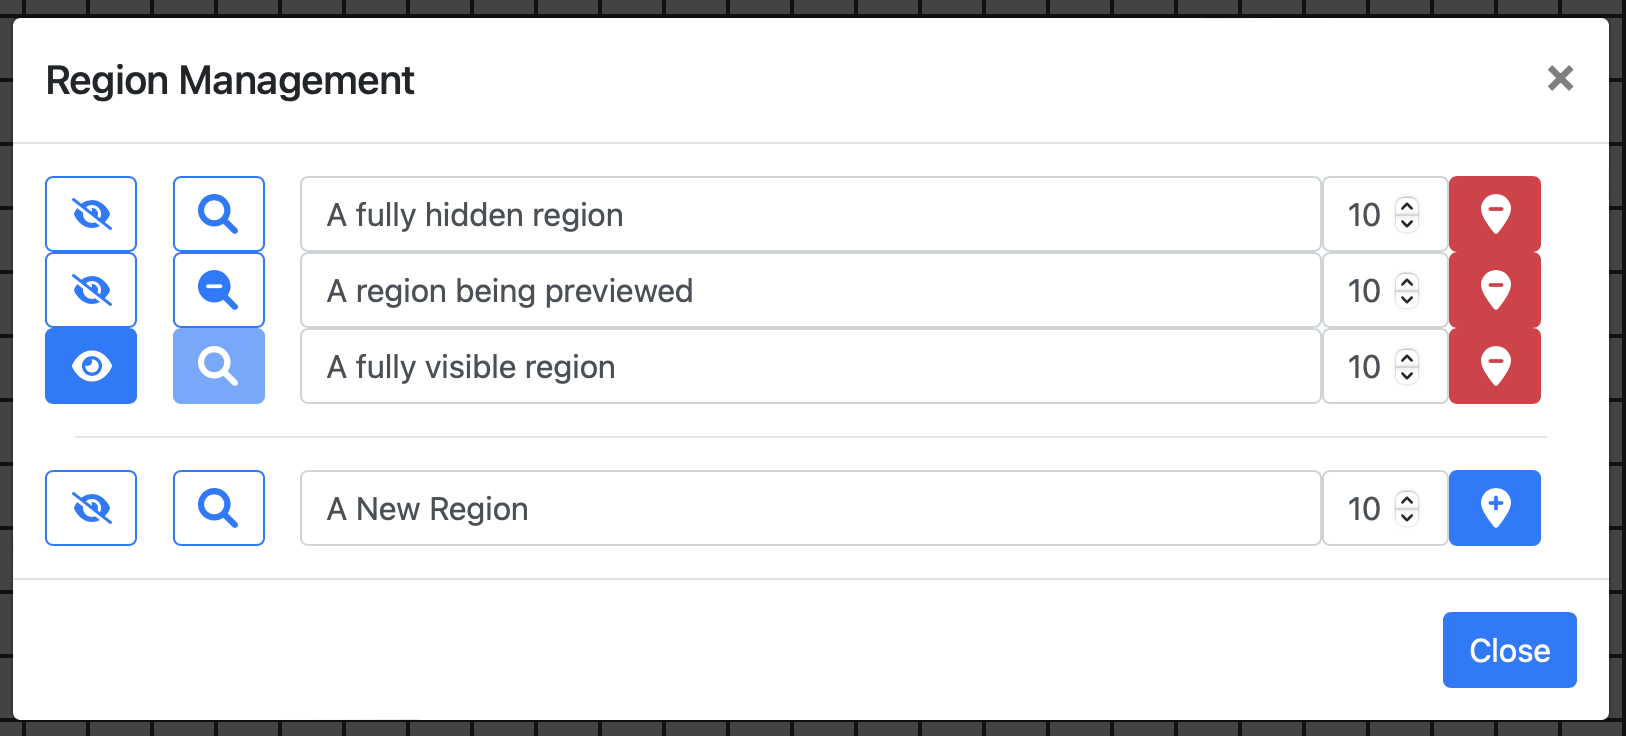
A region allows a form of fog of war. When a region is hidden, only the map owner can see and interact with zones and combatants assigned to the region.

A region must have a unique name.
Regions are only shown to the map owner. To edit the combatants or zones of a region, either use the preview button (the magnifying glass), or show the region.
Deleting a region puts all combatants and zones that were assigned to no region, which means it is always visible.
Edit a Zone
[Zones]{@/battlemap/zone.md} are the shapes, images, and text that add the flavor to your map. This tool allows you to select and edit zones.
The zone you are editing will have control points show up over it on the map. It will also have a zone form in the toolbar, as well as a delete button.

Deleting a zone is permanent and cannot be undone.
The owner can edit any zone, while participants can only edit zones they can see.
Zone updates are sent to all participants as they are done.
After the zone name is the zone-reorder button. Opening this will allow you to directly select the zone you want the one being editing to be drawn after, or as the first terrain, or the first aura.
Most zones have a fill and line color selection. These colors also define the transparency. After that is the line thickness input. This is in tenths of a cell.
Image zones do not have fill, line, or line thickness. Instead, they have an image source field. Dropbox is provided for convenience, but any url will work.
Text zones will have additional fields. The text intput, font, italic, bold, and font size controls. The font size is in terms of cell size, so a font size of 1 means tall letters will take up 1 cell.
Editing a Polyshape
A polygon or polyline is edited by the points used to create it. To move a point, drag it around.
To delete a point, drag it to a neighboring point.
To add a point, click or click and drag the green stars on the lines between points.
Editing others
All other shaps use a standard rectangle control. The text shape ignores horizontal input, but will adjust the font size to the height of the rectangle.
Add a Zone
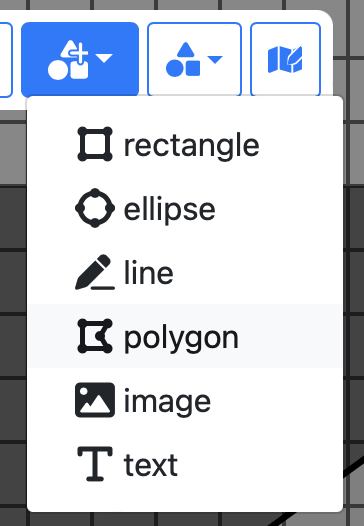
Adding a zone differs a bit based on the zone shape you want to add. Thus, why the add zone tool starts as a dropdown.

After selecting the shape, you are presented with a form similar to the edit zone toolbar. You can edit the fill color, line color, line thickness, and if needed image and text settings. Once you are happy with those settings, it's time to interact with the map.
Once a zone is added, it is sent to all other participants and selected for editing.
Rectangles
Click and drag to create the rectangle.
Ellipse
Click and drag to create ovals and circles.
Polyshapes: Polygons and Polylines
A polygon / polyline need at least 2 points to be useful. If you don't create at least 2, the add is canceled.
Click to start creating a polygon. Then, keep clicking on the map to add more points. To finish drawing, click either on the starting point, or you last point you made.
If you click on the starting point, you will create a closed shape.
If you click on the most recent point added, you will create an open shape; the first and last point will not have a line drawn between them.
Images
Click and drag to create the frame for the image.
Text
Click and drag to set the position and font size of the text.
Grid Settings

There's a tool we skipped, and that the grid settings tool. It's something of a toolbox within the toolbox, visible only to map owners. It contains the tools to edit the map and grid itself. Therefore, grid settings has it's own page